One of my favorite dishes that I ate in Hong Kong over the summer was this Pomelo Salad with Prawns at a nearby Thai restaurant. A pomelo is a citrus fruit that's bigger than a grapefruit but sweet like an orange. Here is a previous post on the pomelo.
Anyway, the salad was so unique. It had grilled spicy prawns tossed over pieces of pomelo and dressed with various yums, the most memorable of which was garlic chips. Ohhh ho ho ho! Now you see how this all ties in with yesterday! Tricky tricky!
In my attempt to recreate or reinvent this lovely dish I was so fond of, I had to improvise a bit. The garlic chips i could do. Check. But where am I going to buy a pomelo in Central Indiana? And even if i did, it would be darn expensive and I wouldn't be able to afford socks in the winter. Eh. That's why I decided to use oranges. It's close enough. I could have gone grapefruit, but I think it's the sweetness of the pomelo that made this work so well, and oranges are sweeter than grapefruit. See how clever i be?
The prawns. Ah yes. No seafood in this part of the country can rival even the crappiest of seafood in HK. There's just no way. So i decided to go with normal large shrimp for this endeavor.
"He's the guy," as Monk would say. "And here's what happened."
Ingredients:
-3 oz raw shrimp, cleaned
-1 orange
-1 tbsp olive oil
-1 tsp hot pepper flakes
-1/4 tsp salt
-some garlic chips (see here to learn how to make them)
1. Clean shrimp. The best way to do it is to pull off the legs first, and peel the back shell off along with it.
2. In a small pan drizzled with olive oil, saute shrimp lightly until no longer translucent. I used the same oil that i used to make garlic chips in. This way, there's a lovely garlic flavor involved as well.
Don't overcook the shrimp! They turn to rubber otherwise. Yes, they will turn into little rectangular pink erasers.
3. Remove from heat and sprinkle with salt and hot pepper flakes.
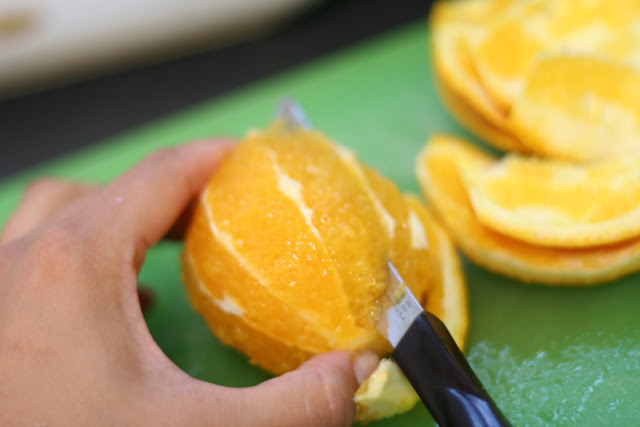
4. Meanwhile, cut the top and bottom off the orange. Then cut the sides off, downward, in a banana-way.
Expose the fleshy-pulpy part of the orange.
5. Use a sharp knife to take out sections of the orange. You will get orange juice everywhere. It's okay.
6. Put orange sections in bowl. Add cooked shrimp.
Top with garlic chips!
7. Serve as a side or as a meal with half a whole wheat pita.
I loved this salad, and I devoured it in about 3 seconds flat. It is a complex mix of sweet, savory, spicy, and garlic (4th flavor), but it somehow all works together wonderfully.
And even though using the actual ingredients to make a pomelo and prawn salad may have cost a fortune, this was really no big cost at all! The shrimp was just in the frozen seafood section of the local grocery store, and orange and garlic is found almost anywhere. So there you have it!
Enjoy my little re-creation! Have a happy Friday :)
For a printable version of this recipe, please click here.
October 30, 2009
October 29, 2009
Garlic Fingers; Garlic Chips
Garlic Fingers
Garlic fingers happen. When you work with garlic as much as i do (or anyone should do), you end up with garlic fingers that will smell delicious yet pungent, and will possibly blind you if you rub your eyes 5 minutes later.
Problem is, no amount of good washing can totally get rid of that smell.
Mmm. I mean, i don't mind it myself, but sometimes you just don't wanna go hang out with people or go to class or pet your poor dog with garlic fingers.
The solution? This is gonna be real complex, so please pay close attention. Stop everything you're doing and focus, cuz i will only say this once:
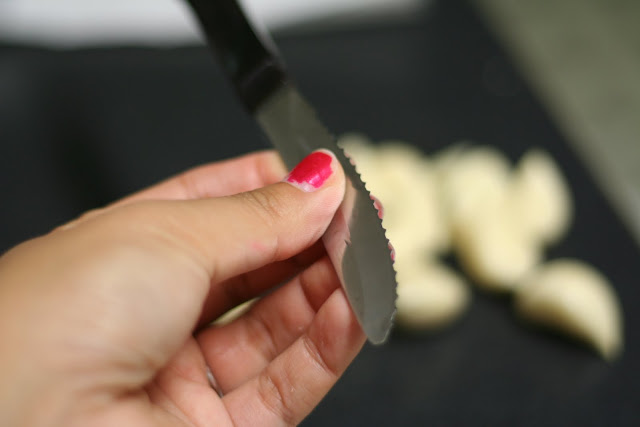
Rub your fingers on stainless steel.
That's it! haha i tricked you and made you get all focused. Truth is, rubbing your intense garlic fingers on stainless steel makes that smell go away!
Luckily, many things in our kitchen, including knives and sinks, are made with stainless steel. So take a knife (though probably not the one you used for cutting garlic) and rub your fingers vigorously along the flat edge.
Soon, that smell will be gone!
Aren't you glad you stopped by here today?
I don't know why it works. My mom told me this a long time ago, and i am a good girl who always listens to her mommy, especially when it suits me best. I think it must have something to do with ions and things, but i will leave that for someone else to figure out.
--------------------------------------------------------------------------------
Garlic Chips
Double feature today! Now you will learn how to make garlic chips!
Garlic chips are little slices of garlic that have been lightly crisped in oil, and they make fabulous toppings for salads, soups, casseroles, or even on sandwiches.
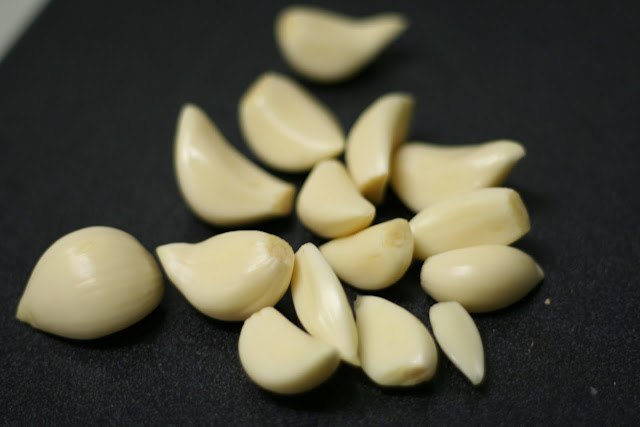
First, you slice garlic real thin, as thin as you can get it.
Then you bring a small saucepan of olive oil to smoke point.
That just means, your oil will start to smoke. I do not have a picture of that because i was kinda panicked. But all was good.
Then you remove the oil from heat...just place it on the burner next to it that's not on. Then do a test chip. Pick up a garlic chip with chopsticks and dunk it into the oil until it's brown.
If you're not skilled at chopsticking, just throw the chip in there and fish it out with a fork. DO NOT PANIC.
Lay chip to cool and de-oil itself on a paper towel.
As the oil gets cooler, you can just drop them in and get them all cooked at once.
Yeah baby!
Another great thing is, you now have a little bit of garlic-infused olive oil in a pan that can be used for sauteing various things. Or dipping bread.
Garlic chips: the fun new way to dress your soups and salads! Come back tomorrow to find out what i did with these :) It involves shrimp. Yum.
Labels:
cooking tips
October 28, 2009
Healthy Chicken Burritos
I love burritos more than life. Unfortunately, a burrito from a restaurant is about 900 calories (that's without cheese) and that pretty much means i have to eat celery and lettuce leaves for the rest of the day. Not fun.
That's why I decided to invent my own chicken burrito that has about 280 calories per serving. It doesn't replace my occasional need for a burrito at qdoba or chipotle, but this is more of an every day burrito that won't undo your gym time. Most importantly, it'll satisfy the burrito craving for the most part :)
Now, the great thing about this recipe is that you can make all the ingredients beforehand, and then anytime during the week if you want a burrito, you can have one in about 5 minutes flat. Grad students of the world, rejoice!
Ingredients (this is for about 6-7 burritos):
-3/4 lb chicken, cubed
-1 tsp taco seasoning
-1 tsp garlic powder
-1 tbsp water
-1 tbsp vegetable oil
-2 avocados, sliced
-1 can of black beans, drained and rinsed
-6-7 low carb tortillas
-salsa, optional
1. First, you have to chop up the chicken. I like using chicken tenders because they're already in strips, so all you need to do is slice them down the strip.
Okay, then in a small container, add chicken and taco seasoning. This is the kind I used.
Add water, garlic powder, and oil, and toss with spoon until well mixed.
Leave in fridge for 1 hour minimum (overnight is best).
2. Now it's time to pan fry chicken in a skillet. Make sure to spray your skillet well. A little tip for sauteing meat: don't stir it around as soon as you add the meat to the pan. Or else you'll end up tearing the poor chicken pieces.
Cook over high heat, occasionally adding a tbsp of water or so to get the steam going, then remove from heat when inside of the biggest chicken cube is white and cooked through.
3. Prepare your avocados by halving them, removing the pit, then scooping the soft inside out of the skin. Slice into thin slices.
Also, here's a possible tip for storing avocado. I have heard that storing avocado with the pit itself makes it last longer. I have not done any studies to prove this. I just do it whether it helps or not. Haha.
4. Now it's bean-time.
Prepare your beans by rinsing them with cold water. The bean juice is evil and full of sodium. Wash it away!
Okay, now you have all the ingredients you need to make burritos anytime, any day.
Oh, and this is the kind of tortilla i used.
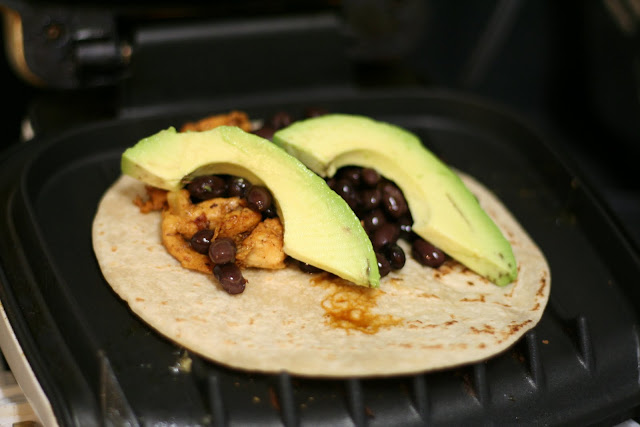
5. To make a burrito, place a tortilla on a grill (george foreman works best)
And fill half with chicken...
Beans...
And avocado!
Fold the other half over and press. If you're just using a normal grill pan, you'll wanna flip it over carefully to get the other side warm.
6. Remove from grill and serve with salsa right on top. Delicious!
Okay, so my folding in half didn't quite work out. All those years of origami and i can't fold a tortilla in half. But no matter. These are delicious!! Sensational!! It will make your senses sing!
The best part about it is that it's low in fat, low in calories (the tortillas are only 70 cals each), and quite healthy for you. The protein and fiber categories are well covered here, so you'll stay energized and full for longer.
But seriously, i don't care how healthy it is, it's just so darn delicious!
Also, for a little extra flavor, you can sprinkle a little extra taco seasoning when you're putting the burrito together.
And now, for the rest of the week, you have these ingredients all ready to go, and you can make a meal in 5 minutes. FIVE MINUTES. From this....
To this!
You'll thank me later.
For a printable version of this recipe, please click here.
Subscribe to:
Comments (Atom)


