August 29, 2011

Sauteed Sesame Leaves - kkennip muchim


Hello, Sunny-side Up Recipes readers!  It seems that the most popular pages on this site tend to be Korean food recipes, so here is another one for you to enjoy.  This is one that I always thought was difficult, but it turns out, it's super easy to make and requires very few ingredients.
Of course, the secret ingredient behind this dish is what Koreans call sesame leaves, or kkennip, a very common green used in banchan or used as a wrap for Korean BBQ.  The sesame leaf is not actually related to what Americans refer to as sesame; apparently, it's called perilla in English.  Anyways, no one in Korea would know what you're talking about if you said you wanted to try perilla, but you would probably get nods of understanding if you ask for sesame leaves.  And that is what I'm gonna call them here.
 

Sesame leaves are super fragrant, so in that sense, they are more like an herb than a leafy green like lettuce.  In size, full-grown leaves are quite large, usually bigger than your palm.


Okay, let's get to the recipe, shall we?

Ingredients (banchan for 4):
-1/4 lb sesame leaves
-2 green onions
-3 cloves garlic, minced
-2 tbsp sesame oil
-soy sauce to taste, approximately 3-4 tbsp


First, bring a large pot of water to boil.  I used my Le Cruset because I am in love with it and try to use it as often as possible :)


Just like when you wilt any large leafy green like kale, it may not look like it'll all fit into the pot, but once they start to cook in the water, they'll lose their stubbornness.  Let them boil for 3-4 minutes or so, stirring every once in a while to make sure all the leaves get fully submerged.


Now, drain the leaves in a colander, then rinse them in cold water until you can handle the leaves.  Once they're cool enough, kinda squeeze out the water with your hands until you can form a ball, like this.


Notice how I haven't wrung it out completely.  It's okay to have some moisture in there...you don't want to totally dry them out.

Go ahead and chop up some green onions.  I chopped two stalks.  Stalks?  What unit of measure should you use with green onions?


Here is my wonderful sesame oil, the life of most Korean dishes.  This is not made from the same sesame plant as the leaves in this recipe; this oil is made from what most Americans call sesame.  Confused yet?  Excellent.


So, put the leaves in a bowl and add all your ingredients together.  Add soy sauce a little at a time.  You're basically using this as your "salt", so this is really to your taste.  I added about 3 tbsps, but you might like things saltier or not as salty as me, so go in small stages and taste in between. 


Mix the ingredients together (use your hands, they work the best), then heat up a pan with a little vegetable oil in it.  Once the oil is hot, add the sesame leaf mixture to the pan.


Saute it for a few minutes until more of the moisture has been zapped out, and the flavor of the garlic and green onions have kinda seeped into the rest of the dish.  That's really what this stage is all about.  Once you're done, it looks like this.


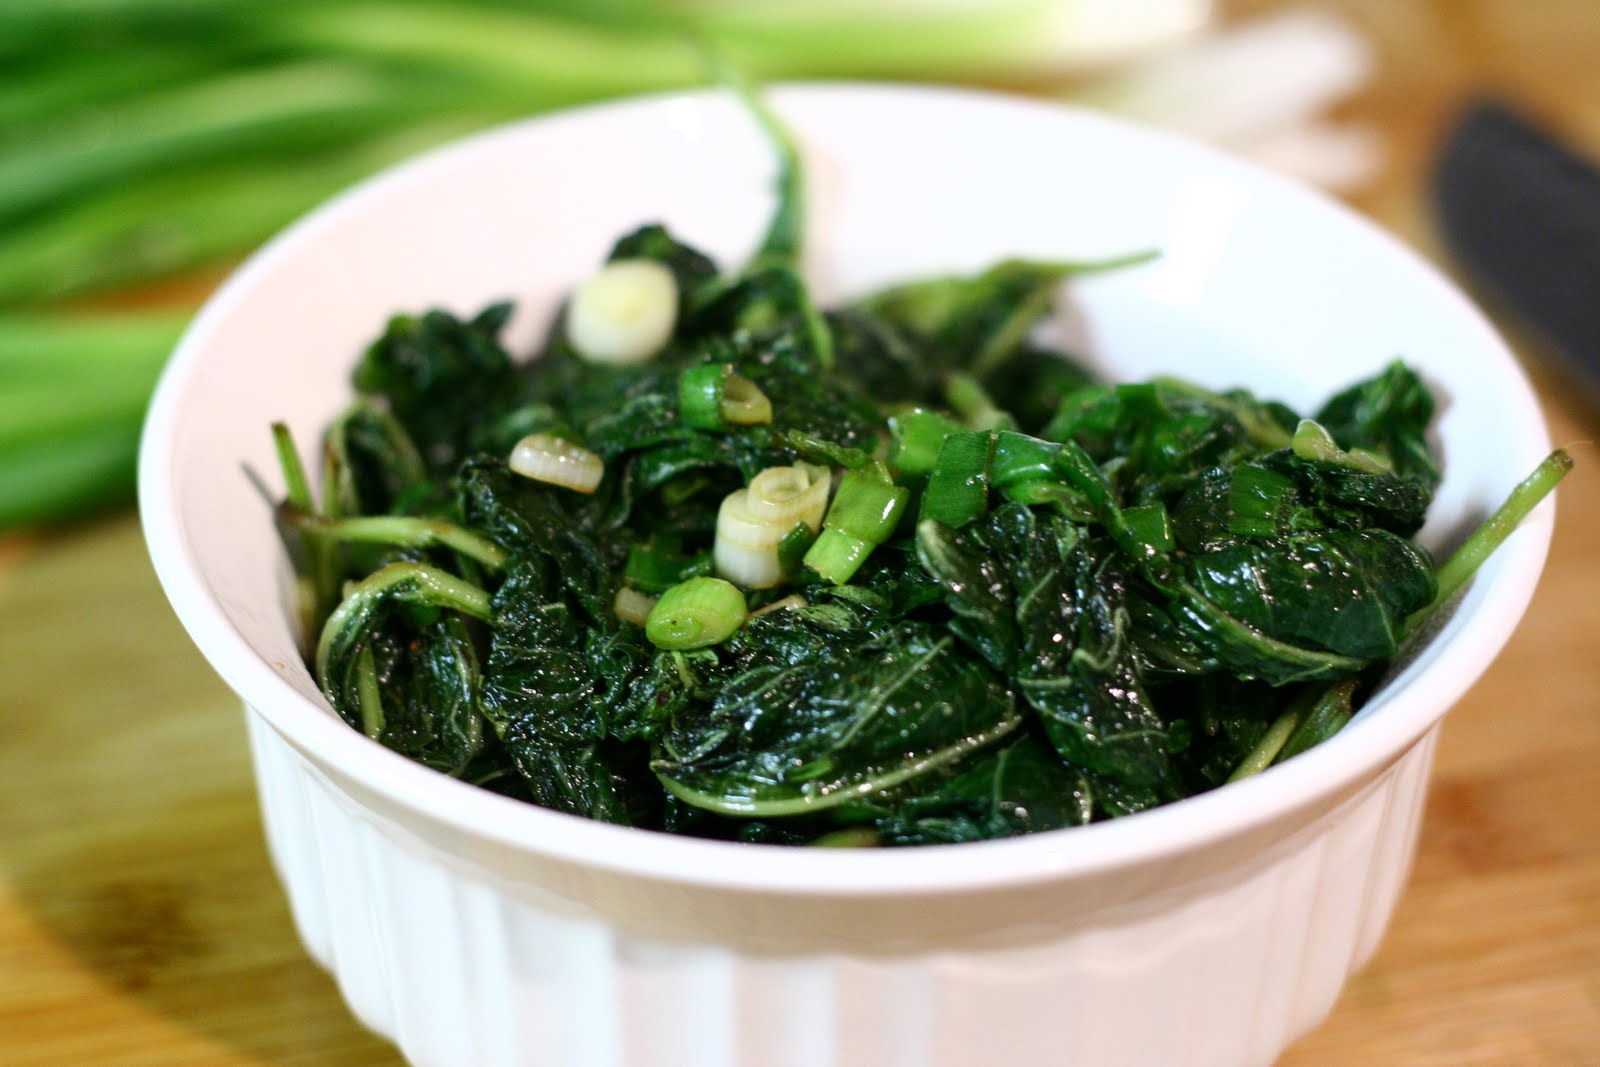
It's a lovely way to get a LOT of veggies into your tummy.  Remember how much we started with?  Now it all fits into a small bowl, and in one mouthful, you could be eating 5 leaves.

I hope you'll try this recipe.  It's really as easy as it looks on here, and it's a nice way to introduce yourself to kkennip, the wonder plant!  For any Koreans out there, I hope this will help you cook like your umma :)  Make some for her the next time you see her.


Love and peace, have a wonderful day, you lovely readers :)

For a printable version of this recipe, please click here.

Pin It

August 22, 2011

Turkey Bacon & Cheddar Quiche


When my good friend Jim came over for brunch last month, I was excited for the chance to make a quiche in my new quiche pan.  This recipe is exciting because you can modify it in so many ways.  In fact, this recipe is modified from a swiss cheese and mushroom quiche recipe in my Moosewood Cookbook.  I modified it because Drew and I would have to eat the leftovers, and Drew doesn't like mushrooms.  So I changed it up a bit and made a turkey bacon and cheddar combo. 

Ingredients:
Crust
6 tbsp butter, cut into small pieces
1 ½ cups flour
about 4 tbsp cold water

Filling
1 small onion, chopped
¾ cup turkey bacon, chopped (or substitute real bacon)
½ salt
a dash of black pepper
¼ tsp thyme
4 large eggs
1 ½ cups milk
2 tbsp flour
1 ½ cups grated cheddar (substitute whatever cheese you like)
paprika 

First, I made a crust.  You could use this one, which uses butter, or this fabulous recipe for pie crust that uses shortening.  Whatever you feel like using!


Here are the small pieces of cold butter.


Cutting the butter into the flour.


All done!  It resembles a course cornmeal when you're done.


Here's my ice water.


Adding a few tablespoons, just a little at a time.


Now we're ready!


Roll the dough out into a flat round.  The edges always look like crap when I do this.  I don't know how you keep it from getting a craggy.  Hahaha craggy is a hysterical word.  I just google imaged it and tons of mountain pictures came up.


Before smoothing it out...very ugly and frustrating.


Acceptable.  I don't really care how it looks, this is how you know a person, not a machine, made it.  :)


Okay, let's now construct the filling!  First, I chopped up a small onion into small pieces like this.


Here's my turkey bacon.  Don't get me wrong; my favorite animal in the whole world to eat is piggy, but considering the amount of eggs and cheese that is in this recipe, not to mention all the butter we just cut into the crust, I think using turkey bacon is perfectly acceptable.  It's only like 35 calories a slice!


So i just cut up about half a pack, which yields something like 3/4 to 1 cup of chopped up turkey bacon.  It doesn't matter a whole lot, just eyeball it.


Normally, I use vegetable oil or olive oil to saute my onion, but I had some butter out and I became Paula Dean for a split second.  Oops, in goes the butter.


Our spices.  Pepper, salt, and thyme.  Add these to the onions as they cook.


After sauteing the onions, they become very soft, translucent, and delicious.  Take them out and set them aside in a bowl.


Now, add the turkey bacon to the pan.  Note: If you are using real bacon, you might cook the bacon first, then cook the onions in the remaining bacon fat.  If you're using turkey bacon like I am here, you don't need to worry about the order, since turkey bacon won't render much fat at all as it cooks.


Separately, you wanna blend together the eggs, milk, and flour until it becomes a nice uniform substance.  I think you can do this with a whisk, but maybe the blender does it faster?  Who knows.


Now, time to construct the quiche!  Step one: layer the cheese in the bottom of the unbaked crust.


I used sharp cheddar because I wanted the flavor to transcend all the egg and bacon and play an equal part in this equation, taste-wise.


Next, add the bacon and onions.  Lastly, pour the egg mixture over the top!


Mmm!  It's like pouring milk over your cereal.  Haha gross, except nothing like that.


All done.


Now, it's ready to go in the oven.  I would highly recommend placing the pan on a cookie sheet or something, in case you wobble going into the oven and spill egg mixture in the bottom of your oven.  Then you have to get all angry and scrub burned egg off the bottom of your oven.


When it's all said and done, this is what you get.


Ahhh yes!


Here's a nice hearty slice of the quiche, which I served still warm with some hash browns.


Looks yummy, yes?  I absolutely loved making this quiche, and it tasted just as good (if not better?) as cold leftovers.  Delicious!  Hope you enjoyed this recipe, let me know how it goes for you!

For a printable version of this recipe, please click here.

August 17, 2011

Johanna's Perfect Pie Crust

My dear friend Johanna is an excellent baker, on top of being the world's sweetest person and a really intelligent researcher and awesome friend.  Oh, sorry guys, she's taken.  But don't be sad, because I'm about to share with you the recipe she gave me and Drew for our wedding (along with a cute pie plate and dough cutter--how adorable is that?) that really makes one of the best pie crusts I've ever tasted.

Ingredients (1 pie crust):
-1 1/3 cups flour
-1/2 cup shortening
-1/2 tsp salt
-3-4 tbsp ice water

First, combine the flour, salt, and shortening in a bowl.  I used all purpose flour...seemed to work well.
 

I have learned to not be as afraid of shortening in the last several years.  When used right, it can be a very helpful substance.  I think the consistency scared me.  But I'm getting over it.


Okay, so you dump it all in there...


And the next thing is to use your dough scraper to mash the shortening into the flour.  This is made extra easy with the use of a pastry/dough cutter.  It looks like this.


The idea behind "cutting" is to chop up bits of fat (usually shortening or cold butter) into pieces so that as there are still little nuggets of solid fat in the dough.  As you bake it, the fat pieces melt and kinda form air pockets that are left behind where the fat nugget was.  That's how you get flaky crusts.  That's why this method is used for crusts, biscuits, and pastries, which are best when flaky.


If you don't have a dough cutter, you can use two knives and just criss-cross them through your dough, like you're guillotine-ing the shortening over and over again.  Hm.


Once you're done, you get what Johanna called a "pebble-like consistency".


Now, adding ice water.  I literally put ice cubes in a bowl with water to make it as cold as possible.  You don't want your shortening to start melting yet, you want a nice firm dough to start with.


After adding 3 tablespoons of water, see if you can form all of the dough into a ball.  If it's still too crumbly, add another tbsp and try again.  Do this one tablespoon at a time until you can form a ball of dough.  Or in my case, a some-what cylindrical lump.


Now, roll it out using a floured rolling pin, and you get something like this!


Put it in your pie plate and shape the ends like this.


I like to poke some holes in the bottom of the dough to release steam from between the dough and the plate.  Though flaky is good, you also don't want it to rise up too high and create volcanoes at the bottom of your pie. 


Now, if your recipe calls for an uncooked pie shell, you're all set.  If not, prebake the crust by lining the crust with parchment paper, adding pie weights or 2-3 cups of raw beans in the pie to keep the volcanoes from forming, then bake it for about 15-20 minutes at 350F.   Then you're ready to go!
Thank you, Johanna dear, for such a lovely recipe :) 

For a printable version of this recipe, please click here

Other posts you might like:

Blog Widget by LinkWithin