April 24, 2009

Sam Gyup Sal

This is my FAVORITE food of all time. There is nothing that I can possibly think of that tops this. Sam gyup sal (literally, three layer meat) is a lesser appreciated member of the Korean BBQ family. Of course, Kalbee (marinated beef ribs) and Bulgoki (barbeque beef) are the ones most people are familiar with. Those are the ones that most people, especially Westerners, tend to enjoy the most. And yah, they're great. But I have a special place in my heart and tummy for Sam gyup sal. My parents know this, and they make this on the first night I'm home when I visit for the weekend.

Sam gyup sal is the same cuts of pork that bacon is made from. But instead of being sliced thin and smoked, sam gyup sal is uncured, unsmoked, and sliced quite a bit thicker than bacon. We get this from local Korean (or otherwise Asian) markets. You can't really find this at your nearest Kroger.
The best way to cook it is on a stone grill. Every Korean family that is a self-respecting Korean family has a stone grill to place on their dining table. It is usually operated by a propane gas bottle. Both the stone grill and the propane gas bottles can be found in Korean markets.

The best things to eat sam gyup sal with are 1) salt pepper sesame oil dip, and 2) pa muchim (green onion salad).

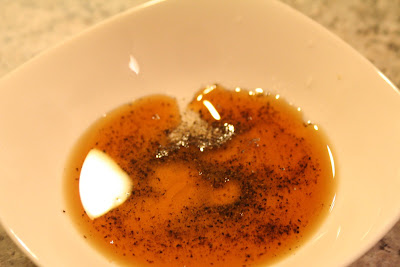
1) Salt Pepper Sesame Oil Dip: combine those three ingredients in a small condiment dish. DONE.
2) Pa Muchim (Green Onion Salad): First, wash an entire package of green onions. This is most likely still not gonna be enough. That is, if my dad is eating with you. Otherwise, you're safe. slice some green onions lengthwise so you get long, thin strips. We even have a special cutter designed specifically to cut green onions this way.So after you run this baby through the green onion, you get this:Then you add the following:
-2 tbsps of sesame oil
-salt
-red pepper flakes
-toasted sesame seedsMix it around. DONE.

Okay. Everyone with me so far? I know there are a lot of things to keep in mind. This is the way that Korean food is, and unfortunately, this is one of the simplest of Korean foods to make. Seriously. And this is just the main dish. Along with bap (rice), which is always, ALWAYS present.
Okay, so to cook the meat, you first want to cut it into smaller pieces, like my lovely assistant is doing here:Haha. That's my mom. And then you lay the pieces down on the stone grill:And then you just let it do its thing. Mmmm sizzle.
I'm just SALIVATING at this point. Just looking at these pictures.

Okay. The other thing you want to have on hand are leaves of lettuce. Red leaf lettuce works best, but we often use romaine because it's cheaper and easier to find in the regular food market. Also, grilling cloves of garlic straight on the grill is an excellent idea. Behold this monster:
So, here's how it all comes together. Grab a leaf of lettuce, dip your sizzling piece of meat--straight off the stone grill--into the salt/pepper/sesame oil dip, and then pile some green onion salad on there. See this?
Fold it over and eat it. Welcome to your new life.

I have no further pictures, as i had to throw aside my camera and eat to my heart's content. Haha i make a sucky food blogger cuz i'm always in such a hurry to eat the food that i just snap a few pics and get on with it. I hope you enjoy.

April 17, 2009

Lemony Shrimp and Angel Hair Pasta


This is a slight variation on the Lemon Chicken Pasta that I made last summer. Drew is visiting this weekend, and we are trying to think of healthy meals instead of going the usual route. Heh. This is a wonderful dish that was 1) ridiculously easy and 2) ridiculously healthy.

Ingredients:
  • 1 lb shrimp, cleaned, raw*
  • 1 lemon
  • 2 servings of angel hair pasta
  • 3 cloves garlic
  • 1/2 onion, chopped
  • fresh herbs (i used italian parsley)
  • salt
  • the Spice Trinity: pepper, garlic powder, onion power
Here are some notes on the ingredients that i chose. I picked raw shrimp because i think it tastes better and picks up the flavors better. But you have to do the grunt work of taking the tail off, taking the shell and legs off, and taking out the poo strip. Though it really doesn't take that long, especially if you have a sous chef, i.e. boyfriend.

The pasta: i chose barilla plus again.
And the best way to juice a lemon. Microwave it for 15 seconds, then roll the crap out of it, then cut it in half and squeeze it like you hate it. it's your thesis. squeeze its head off.

Okay. Steps.
1. Boil pasta.
2. Season the shrimp with the Spice Trinity, and whatever other italiany herbs you got in your pantry. NO SALT, or else they'll lose all their water.
3. Put olive oil and onion in a large skillet over medium heat and stir til golden.
4. Toss in the shrimp and garlic, and add a ladle-full of starchy water from the pasta pot.
5. When shrimp is opaque and pink, add drained pasta to the pan and mix around with some tongs.
6. Remove from heat.
Squeeze all the juice of one lemon into the skillet. Salt and pepper to taste.
7. Let your boyfriend eat the rest of the lemon. Mine gets very happy when he gets to eat lemon. It makes me involuntarily squint my eyes just thinking about it.
8. Serve with chopped fresh herbs.
You can also add mixed veggies to the happy mix. Do this between step 3 and 4.

Check out the deliciousness that is this dish.Drew said this was one of the best dishes I/we have ever made. Yay!

April 15, 2009

Couscous

One of the easiest, quickest meals you can possibly make is couscous. I'm talking FAST. Like, the time it takes you to pull a Lean Cuisine out of the freezer, open the box and vent the film, and pop it in the microwave and let stand 1-2 minutes before eating. I could probably make a full dish of couscous in that same time.

GRAD STUDENT FOOD :)

Here's how.
----------------------------------
1/2 cup couscous
3/4 cup water
1/2 frozen mixed vegetables (i get the peas, carrots, corn, green beans mix)
1 tsp chicken bouillon
salt, pepper, garlic power, onion powder, rosemary, oregano---WHATEVER you want

1. Put water in a small saucepan and bring to boil.
2. While the water's getting there, toss in your chicken bouillon and other spices.
3. When the water reaches a boil (takes no time at all since it's just 1/2 cup water), throw in the vegetables.
4. Add couscous, stir around.
5. Cover it and let stand 4 minutes. Fluff with a fork and serve.
--------------------------------

Literally--
1 minute to boil the water and add the flavors.
4 minutes to let it stand, during which you can take your dog out to potty, wash the measuring cups you used just now, and pour yourself a glass of water. And i usually just eat the couscous straight out of the saucepan because then there are less dishes to do. Whatever, no one's judging.

GRAD STUDENT FOOD :)

Other options, if you have more than 5 minutes to make dinner:
-adding lemon zest to the water, then squeezing some lemon juice to the couscous afterwards makes for a tasty, citrus-y dish
-before you start anything, you could saute some onions and whatever fresh vegetables you have on hand. then pour the water in and start from Step 1 above. That's what i did here with the leftover green beans and yellow squash from the pasta night.
GRAD STUDENT FOOD :)

April 13, 2009

Cake Decorating

First of all, please be kind. This is my first foray into the world of cake decorating with an actual piping bag and tips. I bought 2 reusable piping bags specifically for this.
This Easter, my beloved got confirmed at church. It's a happy occasion for both of us, so some of his friends and I threw a small luncheon to celebrate. I decided to make a casserole (i'll write the entry here later) and a celebratory cake. The casserole = no problem. I can whip up about 10 different casseroles at a moment's notice. They're easy. You just assemble, then bake the thing. My mom always says, "Ugh! American people have it so easy! You just throw a few ingredients together and get a main dish!" Unfortunately, Korean food is not even remotely close to that simple. Okay, so the point is, i wasn't worried about the casserole.

The cake. I decided against using fondant because 1) i have never worked with fondant (i will though), and 2) i knew the counter space I'll be working on has nowhere near the capacity i'd need to roll out fondant and cut out shapes.

So no fondant. But i also didn't wanna use store-bought frosting cuz it's just gross. I can't stand the stuff, especially the white frosting. And this needs to be a white cake because it's a confirmation, you know?

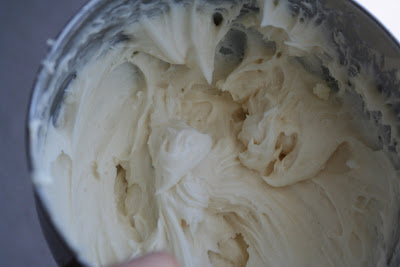
The solution was to make my own buttercream frosting. I wasn't as nervous about this because I had made cupcakes with homemade butter cream frosting, and it had turned out quite nicely.
---------------------------------------------------------
Here's the recipe for Butter Cream Frosting:

1 stick of butter, very soft
1 lb powered sugar
1 tsp vanilla extract
a splash or two of milk (I'm sure whole milk tastes better, but with that 1 stick of butter, i can't bring myself to use anything other than skim milk. to maintain some semblance of health.)

Mix the first three ingredients. Then splash a little milk in there to get the consistency you want. I prefer it a little looser for overall frosting, and a little firmer for detailed piping.

---------------------------------------------------------
First, I split the cake (cooled) in two with a giant kitchen knife. Then I frosted the middle of the cake:Next I plopped the top half on and frosted the rest of the cake. I mixed up a small portion of frosting with blue food coloring, and used it to do the writing. I started with the writing because that is the part that matters most since it reveals the cake's intent, and I need to not be rushed. So here it is, in my standard script i use for writing. Piping letters is not that hard. But just the same, i'm glad my bf has a short name.
Next i trimmed the upper edge with some blue frosting, and made some flowers along the bottom with the same blue. Then i wanted to make some decorative flowers, but I didn't wanna make them pink for a boy's cake. Call me traditional or backwards, but that's just how i feel. So i went ahead and mixed some yellow food coloring and made some flowers using the flat tip. Next i made some green frosting and made leaves, of which i'm very proud. Check out my ghetto artwork! :)

April 05, 2009

Yellow Squash Green Bean Pasta

After a weekend of eating conference food and dulce de leche brownies and restaurant food (all really awesome, don't get me wrong), i felt the need to compensate by making my own dinner tonight. I had FINALLY gotten a chance to go to the grocery store today, and bought 3 types of fruit and 3 types of vegetables (my usual rule of thumb for grocery shopping). Today, yellow squash and green beans were on sale, so i picked those.

When i have miscellaneous vegetables, I usually end up throwing everything together into a soup for ease, but tonight i decided to play "Invent as you go" (IAYG) - come up with a recipe as you're cooking. Actually, this is usually how i cook anyway, but this time I decided to take you through my process. So when i got home, i pulled out one of the funny-looking yellow squashes and some of the green beans, and of course some onion because how can you cook without onion? So there:
I also pulled out my box of Barilla Plus pasta (fortified pasta-like thingies) since i was going for a healthy theme.I had tried this stuff back in Ann Arbor when i was first starting to become healthy, and i could not get through a box of them. Ugh, the texture is just so awkward. BUT i decided recently that i would give it another shot.

Okay, so now what?

First I dealt with the green beans. Some people seem to be afraid of getting real green beans, and opt for the canned or frozen variety. Why? You get so much more crisp out of fresh ones. How to deal with green beans, 101Buy them.
Wash them.
Cut the ends off.
That's it. It's like, the amount of time it takes you to open a can of them. Okay, next i chopped up the yellow squash:Some awesome shots of chopped vegetables...HUAH!And HIYYYYA!
And now the onions join the party.
So altogether it was a handful of green beans, half an onion, and half a small yellow squash. Okay. All the while, boil your pasta (don't forget to salt the water!).

Okay, what now? I decided i'm in the mood for some sauteeing, so i pammed the pan with imitation pam. That's not my actual spraying hand cuz i had to use it to take this photo.
And got out the Almighty and Powerful Spice Trinity
After pamming, i sauteed the onions until somewhat tan (they won't turn golden on pam, you have to be using butter, but i just can't cook with butter). Then i threw in the yellow and green:
Then I pulled the al dente pasta off the stove, reserving some of the starchy water. I gave the pasta a quick cold rinse to stop the boiling process, then tossed them into the pan, and added the garlic powder, onion powder, and [copious amounts of] black pepper. And a little salt to taste.
I threw in some red pepper flakes and cumin too, fun fun. Poured that water i saved into the pan to moisten it up and help coat the spices all over the pasta. Plate it, and you get S-A-T-I-S-F-A-C-T-I-O-N.
This isn't that revolutionary or anything, but sometimes someone needs to point out the obvious. "Oh yeah, it's really easy to make healthy food, i'd forgotten". Cooking for one doesn't have to be complicated or a waste of time. And you know what? That Barilla Plus didn't taste half that bad. It tasted pretty fantastic, actually. Huh.

300 calories. No oil was used at ALL (water and spices were the base of the "sauce"). 3 types of vegetables were used. And it took 25 minutes, and that includes deciding what to make, taking photos every step of the way.

Kiss the chef.

Other posts you might like:

Blog Widget by LinkWithin