April 26, 2010

Mushroom Zucchini Pasta


Our journey begins on a dark, stormy night.

I had maybe about 20 minutes to make a meal that I can eat for dinner several nights this week before I have to go back to my desk and ponder the fine points of my dissertation hypothesis.  So I needed to keep things simple.

Mushrooms.  Nothing is as simple as fungus. 


Angel hair pasta and zucchini. 


Two more ingredients that are also simple and easy, but a little less commonplace in my pantry: capers...


And a shallot.


Wanna see what I can come up with in 20 minutes with these ingredients?  Read on. 

Ingredients (4-5 servings):
-4 servings of angel hair pasta, cooked
-1 shallot
-1 zucchini
-2 cups chopped mushrooms
-2 tbsps capers
-Salt, pepper, and garlic powder to taste

1.  Boil pasta.  No picture needed.

2.  Chop shallots.  Shallots are basically (in my humble, non-expert opinion) small onions with a sweeter taste.  They're so cute!


I bought these ready-to-use mushrooms.  It's not that i don't like chopping mushrooms.  It's actually because I have this internal conflict when it comes to cleaning mushrooms.  I know you're supposed to wipe mushrooms with a damp cloth instead of washing them in water, but I am my mother's daughter, and I want to scrub the h out of them to get rid of every trace of dirt.  But that makes them kinda rubbery.  So, to avoid this internal tension and potential fight I might have with myself, I buy the pre-sliced kind when i can. 


And that's more than you ever wanted to know about Sunny and Mushrooms.

Here's the zucchini.  I have no problems with zucchini.


Cook shallots in some oil on medium heat. 


3.  When shallots are translucent and super fragrant...


add mushrooms and saute them until brown.


4.  Add zucchini.  By this time, the pasta should be well on its way. 


5.  Once zucchini is fairly cooked through, add salt, pepper, and garlic powder to taste.  My taste is that I add a lot of pepper and garlic.  Just sayin'.  Then add starchy pasta cooking water to the pan with the veggies. 


6.  Okay, caper time! 


Capers are usually packaged in some sort of brine.  Add the yummy, briny capers to the sauteed veggies.  Capers have like 5 calories per serving. 


Here they go!


7.  Drain pasta and toss it straight into the pan. 


Toss and serve!


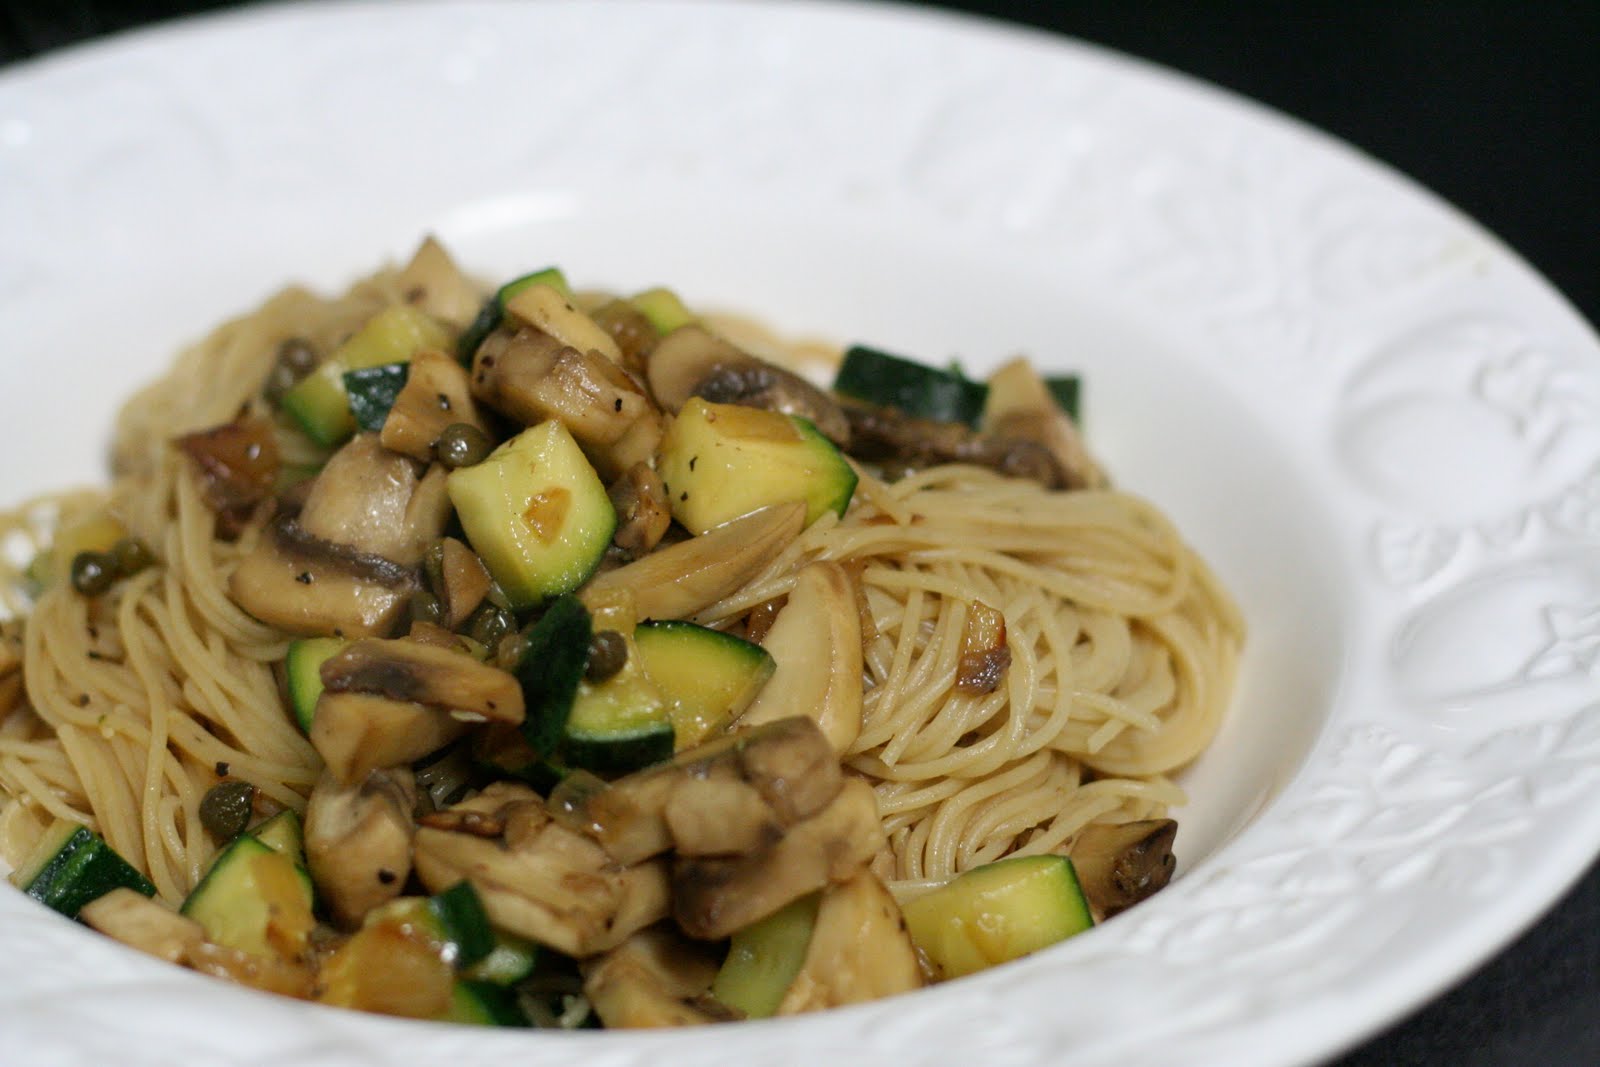
Yum!  Wasn't that super easy?  It's essentially 5 ingredients that you can find for an affordable price. 


And although the idea is simple, the sweet shallots and salty capers add quite a bit of flavor to what might otherwise be a pretty boring dish.


Delicious!  I'm excited that now, after spending only 20 minutes on this lonely, rainy night, I have dinner for the next 4 days set!  Can we say, freakin' score?  


Have a great week!

For a printable version of this recipe, please click here.

April 25, 2010

Sunday Story: Excuses

I have a good excuse for why I haven't posted since Wednesday. 

It's not that it's the end of the semester and I have a stockpile of work to do, although that would be a good excuse.

It's not that I have a prospectus defense coming up and I'm frantically writing, editing, and panicking, although that would be a good excuse.

No.  The excuse is this.  On Thursday I made this amazing Chicken Makhani dish (Indian Butter Chicken)...slaved over the stove for a good 45 minutes making this aromatic, savory chicken using tons of fresh ingredients that I had just bought, including Greek yogurt, shallots, lemon...

Then I took a bite of the chicken.  It was spoiled.

I had bought this chicken over a week ago, but because of the first two excuses above, I didn't get a chance to actually get in the kitchen and cook something until Thursday, and by that time, the chicken had spoiled.  Two pounds of lean, all white meat chicken tenders. 

I spent a tearful few minutes dumping the entire dish into the garbage disposal.  Plop.  Whirr.  Grind.  Sob.  And repeat. 

But I bounce back quickly.  I just made a Mushroom Zucchini Pasta dish and I'll post that soon.  

April 21, 2010

Clarified Butter


Clarified butter is not something that most "typical" American recipes call for.  It's literally butter that has been stripped of its milkfat and water, and what is left of it is the pretty golden butterfat.  I actually had no idea what this was until I started attempting to cook Indian food.  The recipes call for clarified butter, so I decided I should make some to see how feasible it is to make it myself.


I took unsalted butter and melted it in a small saucepan.


Then using a spoon, I skimmed off the white foam.  This does take a few minutes to do, but it's kind of a fun task.


See?


Skimming the foamy foam.


All done!


Okay, then I removed the butter from heat and let it sit.  In the meantime, I tried to figure out what I can use to strain the butter.


I ended up using a coffee filter tied to a mason jar with a rubber band.  AP science classes ftw!


Okay, then I poured the melted butter into the filter.


There.


It took a surprisingly long time for it to filter through.


Toward the end, I admit I got annoyed and punctured a teeny hole to facilitate the process.


Isn't it loverly?


The color of the butter is vibrant yellow, much yellower than the original stick form it came from.  This is because the milk fat has been skimmed off it.  The "sediment" that you see below isn't really sediment...it's because it took that long to filter it, the butter actually hardened at the bottom.

Now I have a few tablespoons of clarified butter all ready to use!  Score! 

April 19, 2010

Baked Popcorn Chicken


When I lived in Ann Arbor, my then-boyfriend (now-fiance) and I would spend the summer going to outdoor movies projected on the wall of a parking structure on Fletcher, then heading to Bubble Island for bubble tea and popcorn chicken.  They have pretty fantastic popcorn chicken...stuff so hot that it kinda melted through the styrofoam takeout box they'd put it in.

I wanted to make some popcorn chicken of my own, but since eating deep fried bits of chicken will undo all my gym time, I decided to make this version that is made right in the oven.

Ingredients (2 servings):
-1/2 to 3/4 lb of chicken, boneless tenders work best
-1 egg
-1 tbsp spicy brown mustard
-1 tsp salt
-1 tsp garlic powder
-1/2 cup italian style bread crumbs


1.  First, I cut up the chicken into small pieces with my awesome new knife.


2.  Then I broke the egg into a small bowl. 


Add mustard, salt, and garlic powder.


3.  Pour bread crumbs into shallow bowl.


4.  Preheat oven to 400F.  I like using the toaster oven for baking projects this small.

5.  Dunk chicken into egg mixture first.


Then coat with breadcrumbs.  I like using chopsticks for this purpose, but you could totally do this with fingers or tongs.


Give it a nice firm pat so the crumbs cover the whole piece of chicken.


6.  Place popcorn chicken on a baking pan covered in foil.  I use the drip pan that came with my toaster oven.  I'm over it.


7.  Bake for 15 minutes, then flip each piece over and bake again for 10 minutes.


Done!


These are great served with a side of spicy brown mustard or ranch.


Delicious!


These are delicious and wonderful for so many occasions!

First of all, this is a great way to get kids into the kitchen--have them help you coat the chicken with bread crumbs.  It's like playing in the sand.


Secondly, this recipe takes very little effort, talent, or money, but it is a total crowd pleaser at parties.


Lastly, it's a great compromise for those of us who are trying to be healthy but still crave something substantial.  Most recipes can be altered to make them a bit better for you, and this is definitely one way you can do that.


Mm!  Look at that lovely white chicken on the inside.  Healthy and delicious!


Enjoy!  And have a wonderful Manic Monday!


For a printable version of this recipe, please click here

Other posts you might like:

Blog Widget by LinkWithin